Considering Checkering
Those who’ve done it will attest that it is an unsettling feeling to pick of a gun whose stock is devoid of checkering. Though uncheckered guns exist, they are the exception and not the rule, and those uncheckered guns are typically wanting in other areas too. It’s safe to say that nearly all fine guns exhibit intentional and well-executed checkering, and the historical record would indicate that as soon as man invented anything that might marginally be considered a firearm, there was some sort of checkering on the wrist and forearm. The purpose of checkering was and is plain: in finishing the contact area of a tool that might move in the user’s hand, a high friction surface might make for a more secure grip. As in all things fine gun-related, however, this practical application soon became a canvas for artistic expression too.
Early checkering saw lots of variation. Flintlock and percussion guns were often fitted with decorative patterns of nails or tacks whose heads protruded above the gunstock surface, making that surface both grippy and uniquely decorative. In Bavaria and Belgium, a fish-scale pattern of checkering was for a time en vogue, and it was cut into gunstocks with a purpose-made chisel that positioned the relieved edge of each scale facing rearward. A basketweave pattern was employed by gunmakers and stockers in different parts of the continent, and though it took a high degree of skill to cut the layered pattern, the result was coarse, and was never adopted in a substantive way. Late in the flintlock era, a convention began to emerge, and the majority of guns began to exhibit a foundation based on a diamond pattern relieved into the stock surface. This proved the most desirable and artful basis for gunstock checkering.
The use of a relieved diamond, i.e. one cut in two dimensions to create both depth and breadth, makes ergonomic sense. A diamond, generally one cut in a 3:1 or 3 ½:1 pattern (3 or 3 ½ times as long as it is wide) can be cut into the stock to create an effect like a series of little pyramids or teeth, which in turn nearly doubles the contact surface area. Not only are the diamonds pointy (high friction), but the hand has twice as much material to grip, and the overall effect is satisfyingly tactile. It also serves to keep the gun securely in the grip of the shooter under recoil.
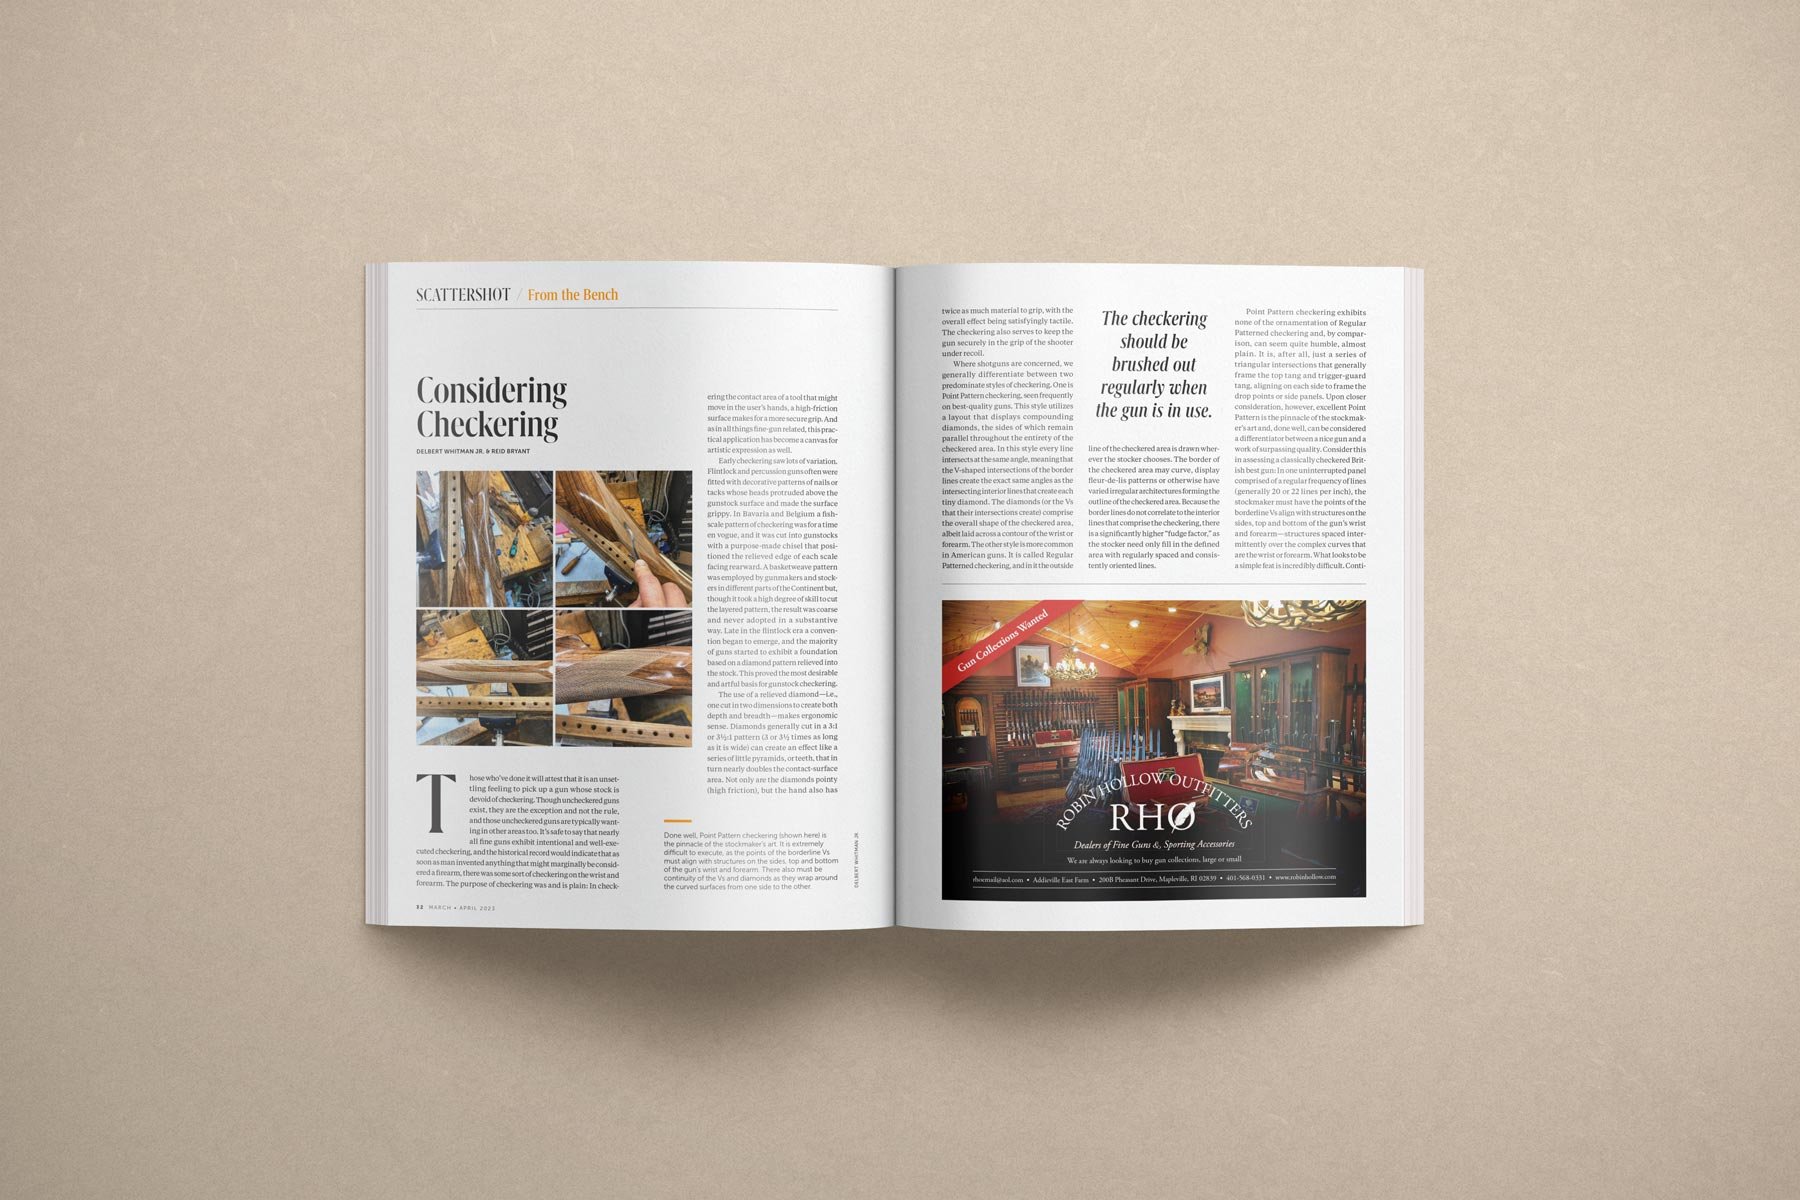
Where shotguns are concerned, we generally differentiate between two predominate styles of checkering. One is a Borderless Point Pattern checkering seen frequently on best quality guns. This style of checkering utilizes a layout that displays compounding diamonds, the sides of which remain parallel throughout the entirety of the checkered area. In this style, every line intersects at the same angle, meaning that the V-shaped intersections of the border lines create the exact same angles as the intersecting interior lines that create each tiny diamond. The diamonds (or the V’s that their intersections create) comprise the overall shape of the checkered area, albeit laid across a contour of wrist or forearm. The other style is more common in American guns. It is called Regular Patterned Checkering, and in this style the outside line of the checkered area is drawn in wherever the stocker chooses it to be. The border of the checkered area may curve, display fleur-de-lis patterns, or otherwise have varied irregular architectures forming the outline of the checkered area. Because the border lines do not correlate to the interior lines that comprise the checkering, there is a significantly higher “fudge factor”, as the stocker need only fill in the defined area with regularly spaced and consistently oriented lines.
Borderless Point Pattern Checkering exhibits none of the ornamentation of Regular Patterned Checkering, and by comparison, it can seem quite humble, almost plain. It is, after all, just a series of triangular intersections that generally frame the top tang and trigger guard tang, aligning on each side to frame the drop points or side panels. Upon closer consideration, however, excellent Borderless Point Pattern is the pinnacle of the stockmaker’s art, and, done well, can be considered a differentiator between a nice gun and a work of surpassing quality. Consider this in assessing a classically checkered British Best Gun: in one uninterrupted panel comprised of a regular frequency of lines (generally 20 or 22 Lines per Inch), the stockmaker must have the points of the borderline V’s align with structures on the sides, top, and bottom of a gun’s wrist and forearm, structures spaced intermittently over the complex curve that is the wrist or forearm. What looks to be a simple feat is incredibly difficult: continuity of diamonds and borderline V’s that begins on one side must wrap around a curved surface and “land” at the same position and in the same angle on other side, basically tilting in pattern on an axis both vertically and horizontally and lining up symmetrically. This superimposed pattern must be cut into a stock structure that is more often than not asymmetrical, what for the realities of cast or palm swell, etc. that make one side different in dimension from the other. In Borderless Point Pattern checkering, everything can change with one subtle bend of a line, or slight off-angle in layout, compounding as each line is laid beside the one before it and rotated around the wrist or forearm. Clean execution of a visually simple checkering pattern is an exquisite gesture of precision and understated elegance, and its isn’t done well terribly often. This is mind-bending stuff undertaken by those with a heightened sense of complex symmetry.
A rough description of the checkering process may over-simplify its complexity, but it is informative, nonetheless. When Del Whitman of DC Whitman Custom Gunsmithing sets out on a checkering job, he generally does so once the stock is at final dimension, and initial finishing of the stock is complete. At this point he very accurately marks the top and bottom centerline of the wrist (bottom centerline for the forearm, and the centerline up/down as seen in profile. Using a diamond-shaped mylar template of a pre-determined size and proportion, he orients the point where rear of the diamond terminates and where points of diamond terminate, typically behind the top tang. He extends those lines into what would be an X, and then ensures that the points of intersection established occur symmetrically when extended from the top to the bottom tang, extending forward to frame the drop points or panels. On the forearm, these initial lines must frame the escutcheon perfectly, leaving symmetrical uncheckered space on every side of the diamond-shaped escutcheon. Confusing, yes, but look at a fine gun, and imagine how the patterned area would be laid out to fall into correct orientation. The magnitude of the feat will readily present itself.
Once layout is set, Del cuts a Master Line. These Master Lines are established with a single line cutter, which resembles a short section of triangular file affixed to a handle. The Master Lines are cut free-hand in short strokes of the file, following a scribed line. Once the Master Lines are extended and the points of each exterior V are established, a 2-tooth cutting tool lays in the successive lines. The structure of this tool and the depth of cut determine the LPI of the checkering pattern, with the majority of best guns exhibiting 22-24 LPI, and 26 LPI being the “tightest” pattern, after which the size of the diamonds fail to serve their intended purpose. One tooth follows the existing Master Line, and the second tooth cuts the line beside it. This process is continued until the terminal lines are established, and then the intersecting lines are cut at the angle determined in layout, creating the tiny interior diamonds. Because this process of successive cuts implies the potential for compounding error, lots of linear measurements are taken throughout, and intermediate marks are made to ensure that each line of the advancing checkering proceeds on track.
Checkering properly requires a series of passes with cutting tools of differing cutting angles. The Master Lines and first pass of cuts are made with a 70-degree tool which, at the prescribed LPI, will not head each vertical diamond up to a sharp point. Once the pattern is established, a second pass is required with a 90-degree cutter which, though it cuts the channel with file-like teeth, almost burnishes the surface of each diamond. On occasion, the cut has to be chased in the opposing direction to eliminate “fuzziness” of retained wood fiber but following these cuts each diamond should be symmetrical and sharp. The checkering can then be tidied up, brushed out, and sealed with a thinned coat of stock finish. The checkering must be brushed out regularly when the gun is in use, and touch-up finishing should be done exceedingly sparingly, as the utility of the checkering requires that the cut channels do not get filled in.
And there you have it: checkering. Like so many facets of the gunmaker’s art, it is a composite of form and function which, done well, is as simple as it is complex. Oft overlooked and surely under-appreciated, checkering deserves a bit more consideration. Checkering done well deserves far more than that.
First Published Shooting Sportsman Magazine